Art is getting messy...and creative!

Clay..Clay..and more CLAY!!
Kindergarten
Kindergarten kiddos created pinch pots with lids out of clay. We began with a ball of clay and put our "thumbs up" inside to create the hole. We then used our "talking hand" to pinch and create a bowl. After smoothing out the clay, artists created a lid. To create a lid, we rolled our clay into a ball and flattened it using the palm of our hands to create a slab. These were then pinched to form a handle. After being fired, artists added color using watercolor paints.


First Grade
First Grade students created clay coil pot birds and nests. We began with the nest by rolling a small piece of clay into a ball and flattening it out to create a slab. Next, we rolled and attached coils on top of one another to create the walls of the nest. It was now time to create the bird! With an extra piece of clay we rolled a large coil and bent it to create the body of the bird. We pinched the clay to create a beak and completed the first portion of our nests by adding texture to the coils with clay tools. Once bisque fired, artists painted these using water color. We will complete these by gluing on eyes, feathers and other elements to make them appear more realistic!


Second Grade
In second grade, we combine our kindergarten and first grade clay projects by creating a Wayne Thiebaud inspired cupcake. To create the cupcake wrapper we rolled a piece of clay into a ball and then created a pinch pot. Next, we rolled coiled and stacked them to create the icing. Some artists used a small piece of clay to create a cherry. Artists then used clay tools to create detail for the wrapper and sprinkles. We kept the two pieces separate so that things could be stored inside! Once these were bisque fired, artists painted them using watercolor.


Third Grade
Third grade students created clay owls. To create these we rolled a large piece of clay and flattened it down with the palm of our hands. Next, we used a small rolling pin to create a thinner slab. Next we added texture for the feathers by using a marker cap. Next we slip and scored the sides and folded them over to create wings (students could add texture to these too if they wanted). Once again we slip and scored the top portion of the clay. We then folded over the top section to create the head. Ears were created by pinching the clay on the side of the head and clay tools were used to complete the feather texture and the eyes and beak for the owl's face. After being bisque fired, artists used watercolor to paint their owls however they wanted!


Fourth Grade
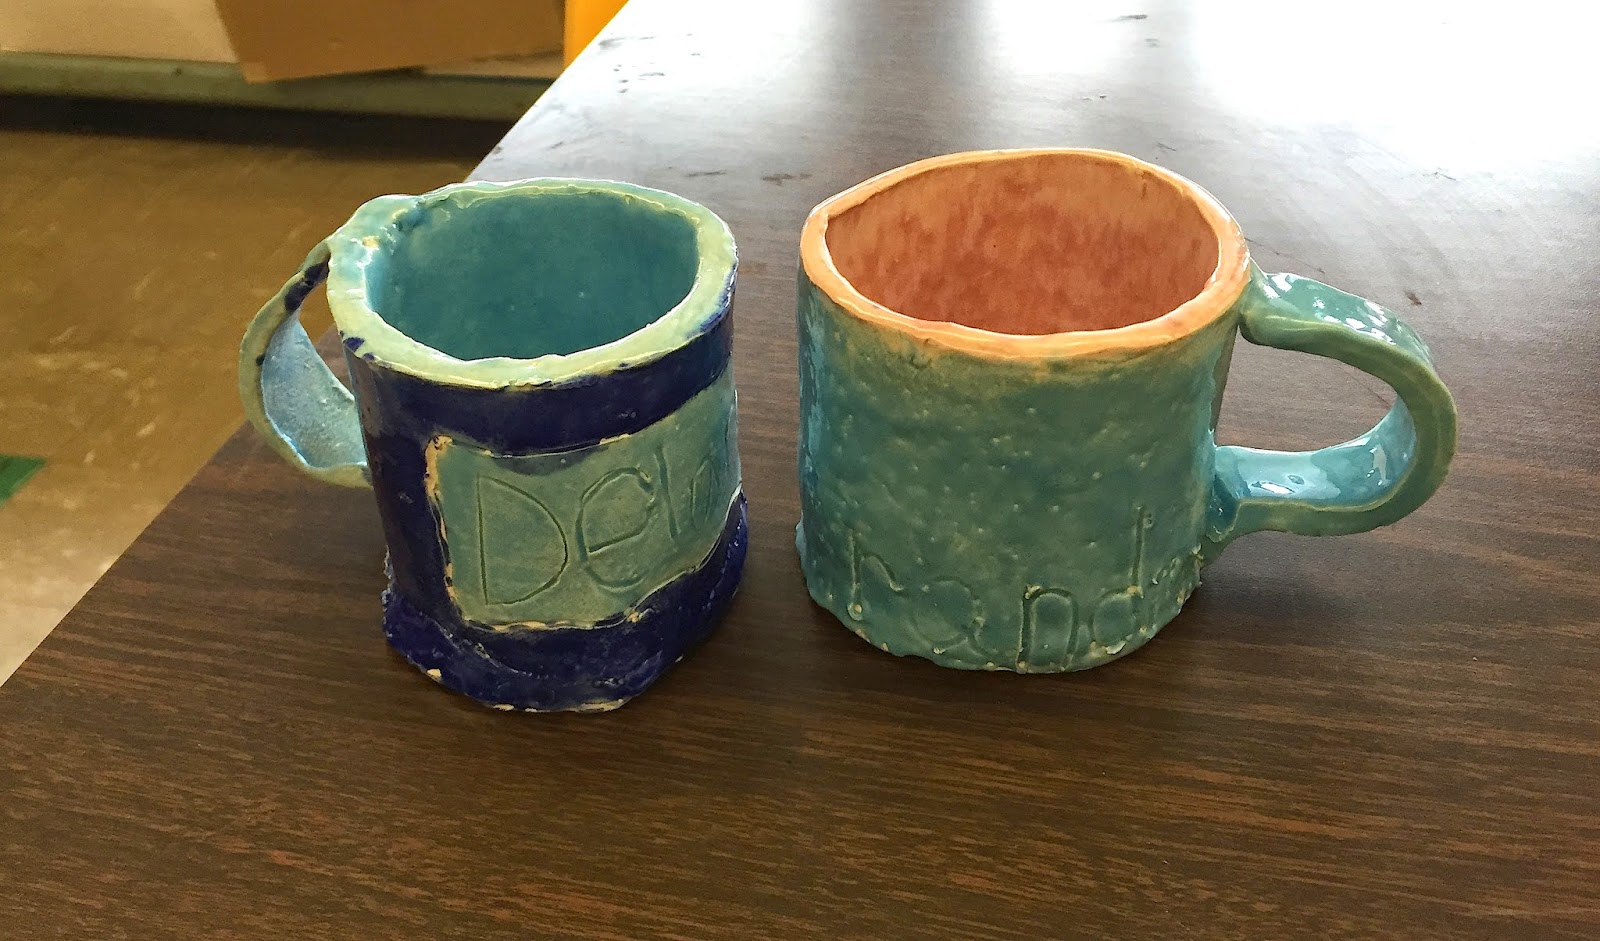
Fourth grade students created clay mugs. I rolled out LARGE slabs of clay and we cut out the pieces for students to build their mug including a piece for a handle, base and walls. Students were reminded of our slipping and scoring technique and applied it when attaching the clay wall, base and handle. Clay tools were used to decorate and customize their mugs. Once bisque fired, students selected (food safe) glaze to add color to their mugs and designs. Once these were complete I painted a layer of clear on the inside to make sure that these would function and not leak!


And now for some of Mrs. Heverly's Art!
college....


Current....


The most important thing about being an artist...is to Keep Creating and Inspire :)
-Mrs.H.-
No comments:
Post a Comment